Best Touchdown League Deck in Clash Royale – BrawlOne
Best Touchdown League deck in Clash Royale featuring Royal Recruits, Furnace spam, and Golden Knight for massive lane pressure and clutch wins.
Table of Contents
If you want consistent wins in Touchdown League, build around Royal Recruits + Furnace. You’ll split-lane pressure, drain elixir, and time Fire Spirits to escort your waves. Golden Knight turns clustered defenses into touchdowns, while Dark Prince and Barbarians lock down lanes and counterpush. Fill the support slot with Tornado, Zappies, or Hunter to control air and set dash windows. The core’s simple—execution isn’t. Here’s how to make it oppressive match after match.
Why Royal Recruits Dominate Touchdown League
Because Touchdown rewards constant lane pressure over single big plays, Royal Recruits dominate by flooding both sides with durable bodies that always threaten a run. You win trades because their split spawn forces repeated answers while you cycle spawners and Evolutions. In the current clash royale touchdown meta, a royal recruits touchdown deck pairs perfectly with Furnace: constant Fire Spirits chip, stall, and pathing control create safe lanes and trigger favorable interactions. This furnace spam touchdown deck also fuels your golden knight touchdown strategy—click through clutter when Recruits pin targets and open gaps. Recruits soak spells, reset DPS, and blunt NATO or Magic Archer lines, often yielding positive trades. As waves layer, opponents overspend, and you refresh pressure, ensuring royal recruits dominate touchdown.
Full Touchdown League Deck List
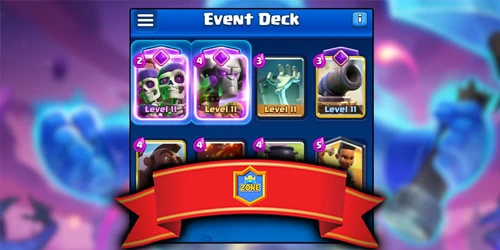
Here’s the core list you’ll run: Royal Recruits, Furnace, Golden Knight, Dark Prince, and Barbarians. You’ll spam Recruits for lane pressure while Furnaces chip and cycle, then click Golden Knight to punish clusters. Use Dark Prince and Barbarians to protect spawns and convert stops into touchdowns.
Royal Recruits
While Touchdown punishes overcommitment, you’ll win by anchoring your deck with Royal Recruits and cycling steady spawn pressure. In any clash royale touchdown league deck, Recruits are the linchpin: they split-lane, body-block, and set up charge conversions. That’s why the best touchdown league deck clash royale lists them as the primary win condition in a touchdown deck clash royale and even in a clash royale best touchdown deck.
You’ll cycle Recruits on curve, then time Golden Knight’s dash to pierce clustered defenders and convert lanes. Dark Prince follows as a stun-and-shove escort, protecting Recruit charges. Use Zappies or Hunter to swat air and stall tanks. Hold Tornado for grouping into dash and recruit swings. Conserve elixir, maintain spawn tempo, and click ability only when it secures field control and opens a lane.
Furnace
Often the difference-maker in Touchdown, Furnace fuels the entire game plan by layering constant fire spirit spawns that chip, force responses, and pace your evolutions. You’ll cycle Furnaces to harass both lanes, buy time, and open windows for your strongest pushes. Treat it as a win-condition engine and a tempo brake: place early, bank elixir, and let the spawns set up your next wave.
- Placement: center or split-side to cover lanes, but space it to dodge value from ranged splash.
- Timing: align fire spirits with Royal Recruits entries and evolution windows.
- Discipline: accept a lost round if it accelerates your Furnace cycle and evolution queue.
| Goal | Placement Tip | Timing Cue |
|---|---|---|
| Chip + pressure | Offset from bridge lines | Right as Recruits deploy |
| Defense tempo | Back-center, spaced | Into enemy cycle gaps |
| Combo setup | Mirror lane with push | Before ability/evolution sync |
Golden Knight
Because Touchdown is all about tempo swings, Golden Knight is your catalyst—his dash converts Furnace chip and Recruit screens into instant lane breaks. You cycle Furnaces to soften targets and spawn Fire Spirits, then drop Royal Recruits to split lanes and set dash paths. When enemy units stack, click his ability to carve through supports, chain to backliners, and surge into daylight.
Play for timing, not spectacle. Let Furnaces and Recruits bait responses, then trigger the dash when two to three units line up. Use Hunter or Zappies behind him to punish air and stall beatdown. Save Tornado for high-value clumps that extend his chain or yank counters into Fire Spirits. If you’re behind, accept a sacrificial wave to reset cycles and set up the next decisive dash.
Dark Prince
Dark Prince is your bruiser-sweeper, bridging the gap between Recruit screens and Furnace chip with charge-based splash that cracks clustered defenses. Drop him behind a Recruit wave to soak spells and dash through skeletons, goblins, and mini-tanks that would stall your lanes. His shield lets you trade favorably into chip and stuns key targets on impact, buying time for Furnace spirits and Recruit reinforcements to connect.
Use him to punish overcommits: set him mid-map to catch kites, then Tornado clumps into his swing for a clean wipe. Sync his charge with Furnace spawns so the spirits peel distractions and guarantee contact. Don’t mistime the dash; you’ll lose Evolution windows and hand over tempo. At 3.0–4.0 curves, he cycles smoothly, sustaining pressure between Golden Knight bursts.
Barbarians
Anchor your lanes with Barbarians as the cheap, durable frontline that turns Furnace trickle and Recruit spawns into touchdowns. Drop them at midfield to soak shots, stall threats, and escort waves that your Furnaces and Royal Recruits keep feeding. They bait small spells, protect squishier support, and win you end-zone scrums.
Use Barbarians to body-block single-target bruisers like Goblin Giant, stop charges, and buy time for spawns to slip through. Pair them with Dark Prince to shred clumped ground while Barbarians pin key targets. Cycle Furnaces and Recruits first, then add Barbarians when you’re ready to commit or need to stabilize.
Hold elixir for a clutch Golden Knight click or Tornado pull behind your Barbarian wall. Against air spam, include Hunter or Zappies and time your spawns.
Zappies or Hunter
While the core stays the same—Recruits, Furnaces, Golden Knight, Dark Prince, Barbarians, Tornado—you flex the last support slot as Zappies or Hunter to cover matchups. Pick Zappies when you expect Goblin Giant or repeated swarm pressure. Their stuns lock lanes, desync charges, and protect Furnace waves when you don’t have a building. They pair naturally with Recruits’ split lanes, letting you stall cheaply and convert chip into touchdowns.
Choose Hunter when you need burst to delete big units or air threats fast. Position him close to maximize pellets and trade up versus tanks and flyers. Zappies thrive in low-elixir cycles; Hunter shines as a reactive stopper during high-commit pushes.
- Zappies: multi-target stun, swarm control
- Hunter: burst DPS, tank killer
- Matchup decides the slot
Tornado (NADO)
After choosing Zappies or Hunter for your flex slot, you anchor the deck’s control with Tornado. In Touchdown, NADO’s job is simple: group, drag, and deny. Pull clustered troops—Recruits, Goblin Giant support, or swarms—straight into your lane so Furnace spirits and Dark Prince cleave erase them. Yank ranged or flying threats like Magic Archer, Hunter, or Hound support off your runner’s path, or into Zappies/Hunter for a clean pickup.
Use NADO to reset charges and abilities, stalling Golden Knight or Barbarians, and to reposition tanks (Giant, Goblin Giant) into your spawns or building zones. Pair it with Royal Recruits pressure to force awkward placements, then punish. In overtime, hold NADO for clutch pulls—group defenses for one AoE wipe or drag defenders away to secure the touchdown.
How to Play the Royal Recruits Touchdown Strategy
You’ll cycle Furnaces early to build Evolution pressure and layer Fire Spirits behind your Royal Recruits. You’ll click Golden Knight when your Recruits or enemy units group, letting his dash chain through lanes for massive value. You’ll anchor defense with Dark Prince and Barbarians to stop pushes, protect spawns, and avoid leaking elixir.
Cycle Furnaces for Evolution Pressure
Consistently cycle Furnace early to flood lanes with Fire Spirits, chip defenses, and bait counters as you build toward Evolution windows. Open safely with Furnace or Royal Recruits, then keep elixir light so you can reach Evolutions quickly. Sync Furnace spawns with Recruit waves—drop Furnace so Fire Spirits meet your advancing line, forcing cheap defenders to trade down or misposition. Your Recruits soak spells and troops, letting Fire Spirits and later Evolutions connect for multi-unit value. If you fall behind on elixir, don’t panic—sacrifice a round to reset and place another Furnace. That steady spawn tempo is your win condition in Touchdown, not one big push.
- Stack Furnaces opposite lanes to split pressure and drain answers.
- Place Furnace preemptively to time spawns with bridge meets.
- Hold Tornado to cluster defenders into Fire Spirits.
When to Use Golden Knight Ability
Furnace pressure set, the next edge comes from timely Golden Knight clicks. You want to press the ability as he begins his charge into a packed lane—Recruits, Furnace spirits, or clustered troops—so he chains through bodies, preserves your waves, and chips near the line. Sync the click with Recruit surges and Furnace spawn timers; that amplification forces awkward trades and overcommitment. Hold the dash versus high-HP counters like Giant or Goblin Giant; interrupt their pathing, then let Hunter or Zappies finish. If opponents pack Tornado or stuns, bait them with a lone spawn, then click and punish cooldowns. In tight endings, favor multi-lane dashes to guarantee one wave slips through.
| Moment | Golden Knight Click |
|---|---|
| Packed lane | Start of charge |
| Recruit surge | Mid-push amplify |
| Giant/GG counter | Interrupt dash |
| NATO baited | Immediate punish |
| Split defense | Multi-lane chain |
Defensive Stability With Dark Prince & Barbarians
While Recruits and Furnaces set tempo, Dark Prince and Barbarians lock your defense in place. Use Recruits plus Furnace as your engine, then float 4–6 elixir to slam Dark Prince and Barbarians into counter-pushes. Dark Prince’s splash deletes grouped swarms and soaks charges; let Barbarians clean up single-target threats for efficient trades. Hold Barbs reactively to body-block win conditions, pairing Tornado or Recruits to protect your Furnace spawns. Time Furnaces so Fire Spirits overlap with Recruit waves, even sacrificing one cycle to hit Evolution windows and preserve stability. Add Zappies or Hunter versus air or high-damage units, but don’t overcommit—keep your Recruit cycle funded.
- Save 4–6 elixir to intercept counter-pushes cleanly.
- Click Dark Prince to wipe swarms, then Barbs finish.
- Pair Barbs with Tornado to force favorable trades.
Best Support Cards for Air and Swarms
When skies fill with bats and balloons, you need support that deletes air and freezes swarms in place. Run Hunter and Zappies as your core. Hunter melts flying tanks and clustered swarms when you park him behind Royal Recruits or a Furnace lane. Zappies give cheap, repeat stuns that stall Balloons, kite support, and buy time for your spawns to cross.
Add Magic Archer for lane control. Angle him to pierce thin air lines and tag backline support so your Fire Spirits and Recruits survive. Furnace doubles as persistent air denial—its spirits force responses, distract flyers, and drip chip.
Layer defenses: Hunter handles tanks, while Magic Archer (or a Bomber-type splash) cleans small flyers. Prioritize instant, multi-target, repeatable control to punish grouped aerial pushes.
Pro Tips to Win More Touchdown League Matches
Although Touchdown rewards chaos, you’ll win more by structuring it: cycle Royal Recruits and Furnace as your default pressure, then time Golden Knight dashes to break clustered defenses. Open with Recruits to split lanes and stack Furnaces; you’ll chip, farm Evolutions, and drain elixir. Click Golden Knight proactively when enemies clump—use Tornado to group targets, then dash to extend Recruit waves into the end zone. Don’t panic if you drop a round; keep your spawn cycle and hit key Evolution windows. Slot Zappies and Hunter to cover air and shut down Goblin Giant when you lack a building.
- Stagger Furnaces so their Spirits overlap, denying kites and enabling chain dashes.
- Hold Tornado for bridge jams; convert defense into immediate offense.
- Track opponent spells; punish when their splash is down.
Frequently Asked Questions
What Card Levels or Evolutions Are Most Important to Prioritize for This Deck?
Prioritize maxing Royal Recruits, Furnace, and Golden Knight; evolve Recruits first, then Furnace. Level Tornado for reliable pulls. Next, raise Zappies/Hunter for air, then Dark Prince and Barbarians for defense. Keep spells and cycle cards at competitive tournament levels.
How Do I Counter Hard Counters Like Executioner or Bowler in Touchdown?
Focus on split-lane pressure and staggered spawns. Bait their swirl with early Recruits, then punish opposite lane with Golden Knight dash. Place Furnaces wide, pull with Tornado, and stack Zappies/Hunter. Don’t clump; cycle patiently and outlast their elixir.
What Starting Hand Plays Are Safest if I’M Down Elixir?
Open passively: Furnace in back, split Recruits late, or cycle Zappies/Hunter safely. Hold Golden Knight and Tornado. Don’t bridge spam; defend first, then counterpush. If nothing safe, wait for full elixir and scout their cycle before committing.
How Should I Adapt the Deck for Lower Card Levels or Missing Cards?
Swap Golden Knight for Knight or Valkyrie, use Guards/Skarmy for Barbarians, Fire Spirits/Goblin Hut for Furnace, Mini P.E.K.K.A./Prince for Dark Prince, and Archers/Musketeer for Zappies/Hunter. Prioritize cheaper evolutions, play reactively, conserve Tornado, and defend first.
When Is It Correct to Split-Push Versus Stack a Single Lane?
Split-push when you’ve got cycle spawners rolling, opponent lacks splash or Tornado, or you’re up elixir. Stack one lane when defending a heavy push, exploiting Golden Knight pathing, or securing evolutions—force trades, protect advantage, then pivot.
Conclusion
You’ve now got a simple, brutal Touchdown game plan: split Royal Recruits, stack Furnaces, and time Fire Spirits to force bad trades. Use Golden Knight to punish clumps, Dark Prince and Barbarians to wall off lanes, and Tornado or Zappies/Hunter to control air and set up dash windows. Keep tempo, stagger pressure, and bank elixir with smart defenses that turn into touchdowns. Stick to this rhythm, and you’ll grind out wins, tilt opponents, and own Touchdown League.